Start and Configure the VMware Server
On the VMware server computer, run a bootstrap from the USB drive:
- Insert the memory stick into a USB connection port.
- Switch on (or reset) the computer.
- The ESXi boot menu displays.
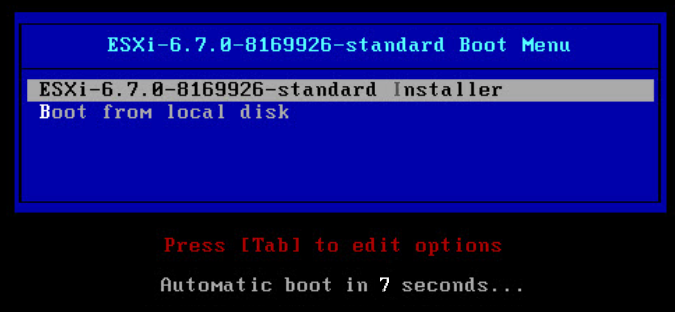
- Select the ESXi ISO disk image, for example ESXi-6.7.0-<nnnnnn>-standard Installer, and press ENTER.
- The ESXi installation welcome page displays.
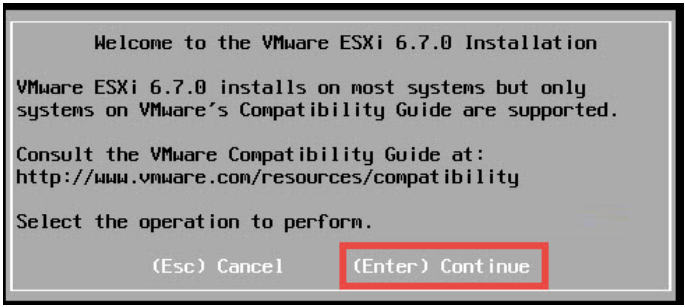
- Press ENTER.
- The End User License Agreement page displays.
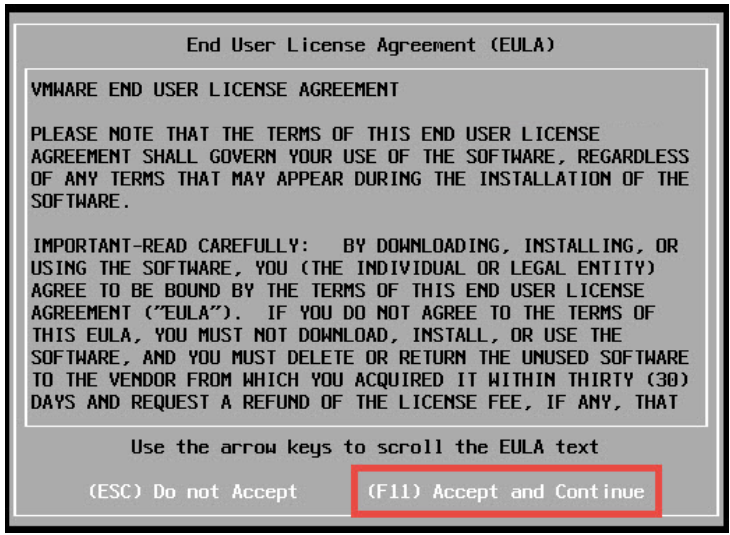
- Press F11 Accept and Continue.
- Follow the installation steps to set the following:
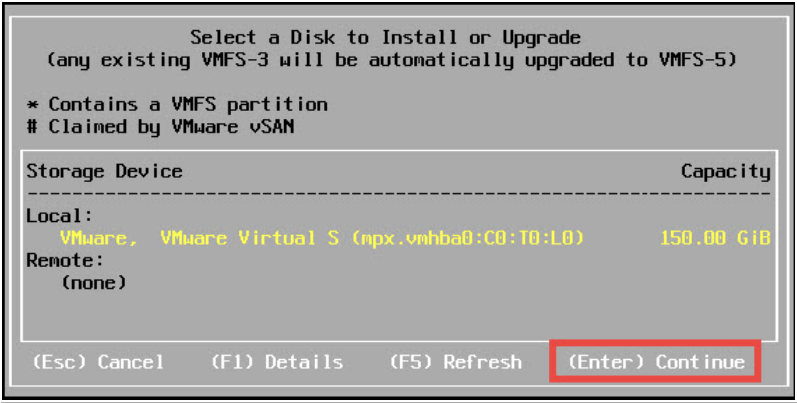
- Select the physical disk on which to install ESXi and press ENTER.
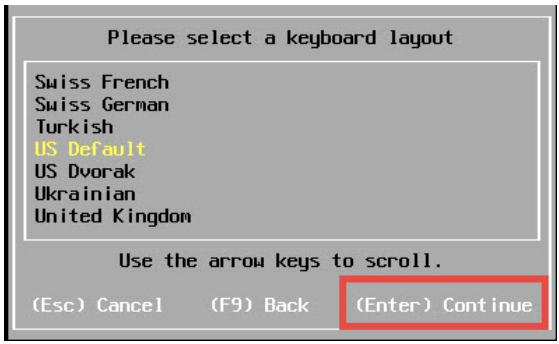
- Select the keyboard layout and press ENTER.
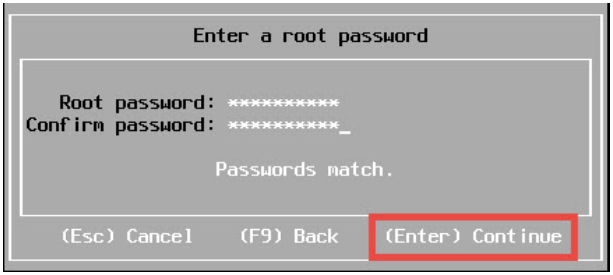
- Enter and confirm the Root password and press ENTER.
NOTE: You will need this password in the next steps.
- After that, confirm the reboot to let the VMware ESXi software start.
- The ESXi start page displays.
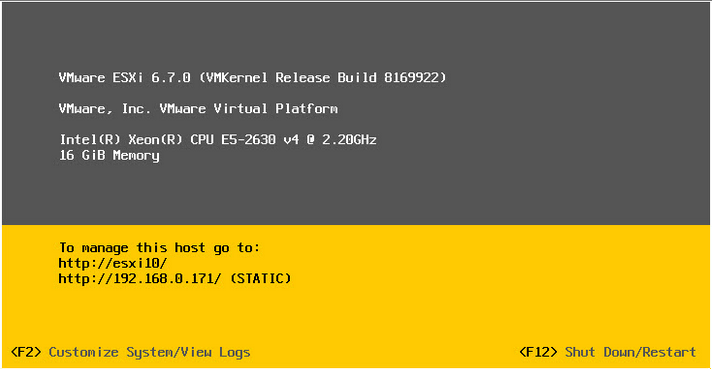
- Press F2 from keyboard for customization.
- The Authentication Required page displays.
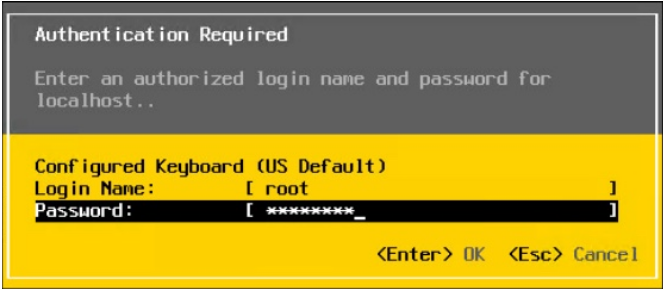
- Enter the root password that you set during the installation steps above.
- The System Customization page displays.
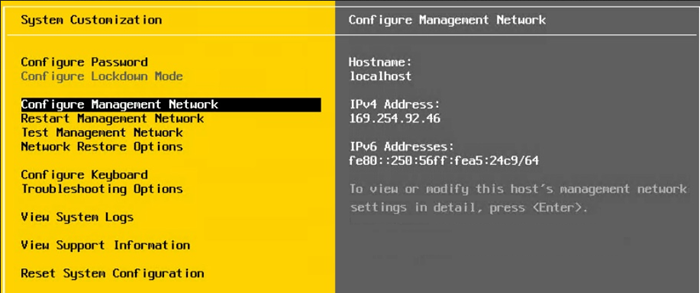
- Using the up/down keys, select Configure Management Network and press ENTER, then select Network Adapters and press ENTER.
- The IPv4 Configuration page displays.
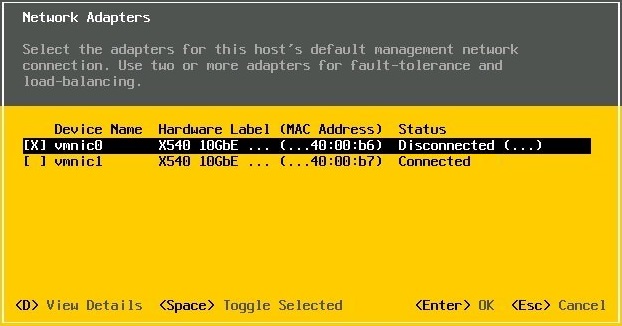
- Select the network adapter, press Spacebar, then press ENTER.
NOTE: Press D to view the network adapter details and then ENTER to go back.
- Back in Configure Management Network, select IPv4 Configuration and press ENTER.
- The IPv4 Configuration page displays.
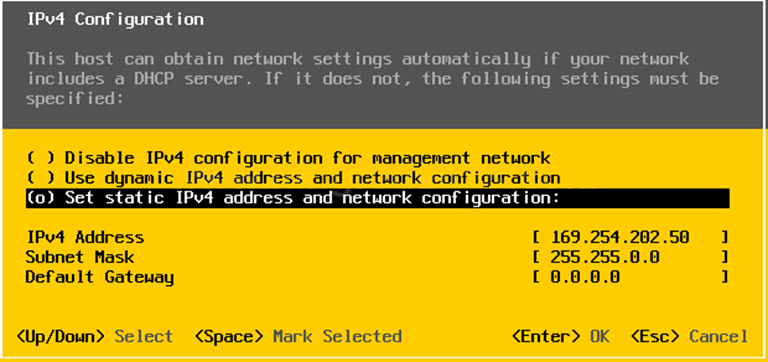
- Select Set static IPv4 address and network configuration and press SPACE, then set the IP address you want to use, and press ENTER.
- Press ESC to exit the console.
- The system restarts to apply the configuration changes.
